
Ideally the photos should be of the heads of the couple or person and be about 3.25" wide and about the same high. After receiving the photo, prep it by cropping and resizing.
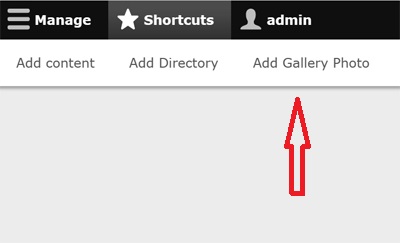
The Add Create Gallery Photos to the Resident Gallery and other views in the website.
The same file is added twice to compensate for a problem with adding ColorBox photos.
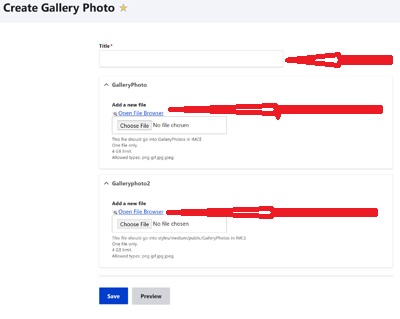
The Title is the Database Key for the Photo which is the <last name><first name>. EX: AbstonMargie.
For the GalleryPhoto, select the Open File Browser link just above the Choose File box to place the file in the GalleryPhotos folder in IMCE.
Also select the same file for the style/medium/public/GalleryPhoto folder in IMCE.
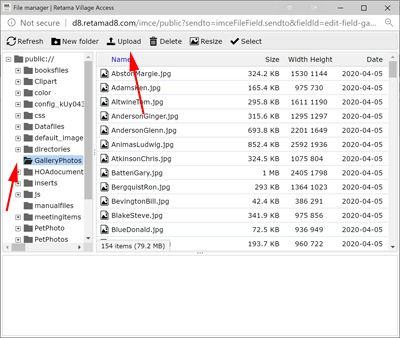
Insure the folder on the left is the GalleryPhoto. or style/medium/public/GalleryPhoto. Then select Upload button.
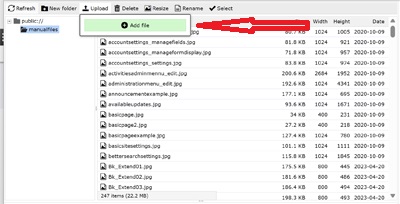
Click on the Add File button.
That will open the Windows File Manager window where you will browse to your new photo.
Click on the photo and then Open button.
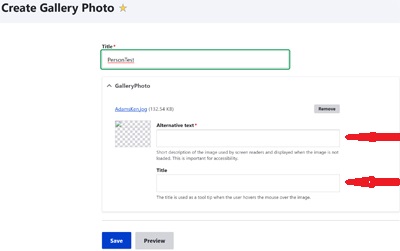
In the Alternate Text box, enter the full names of the couple in the photo. Ex: Margie Abston & David Hudson.
In the Title box, enter the last name of the photo. Ex: Abston.
For the second file, only the Alternate Text is needed.
At the bottom of the page, select the Save button.
To change the photo in the case of an update. Open the Gallery Photo record. Then click on the Remove button. Then click on the Open File Browser. Click on the photo being replaced and click on the Delete button. After the old photo is deleted, then upload the new photo and click on the Select button.
The last step is to toggle the photo box for both people in the photo in the Access Residents table.